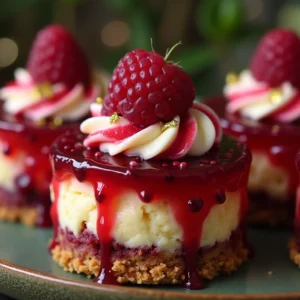
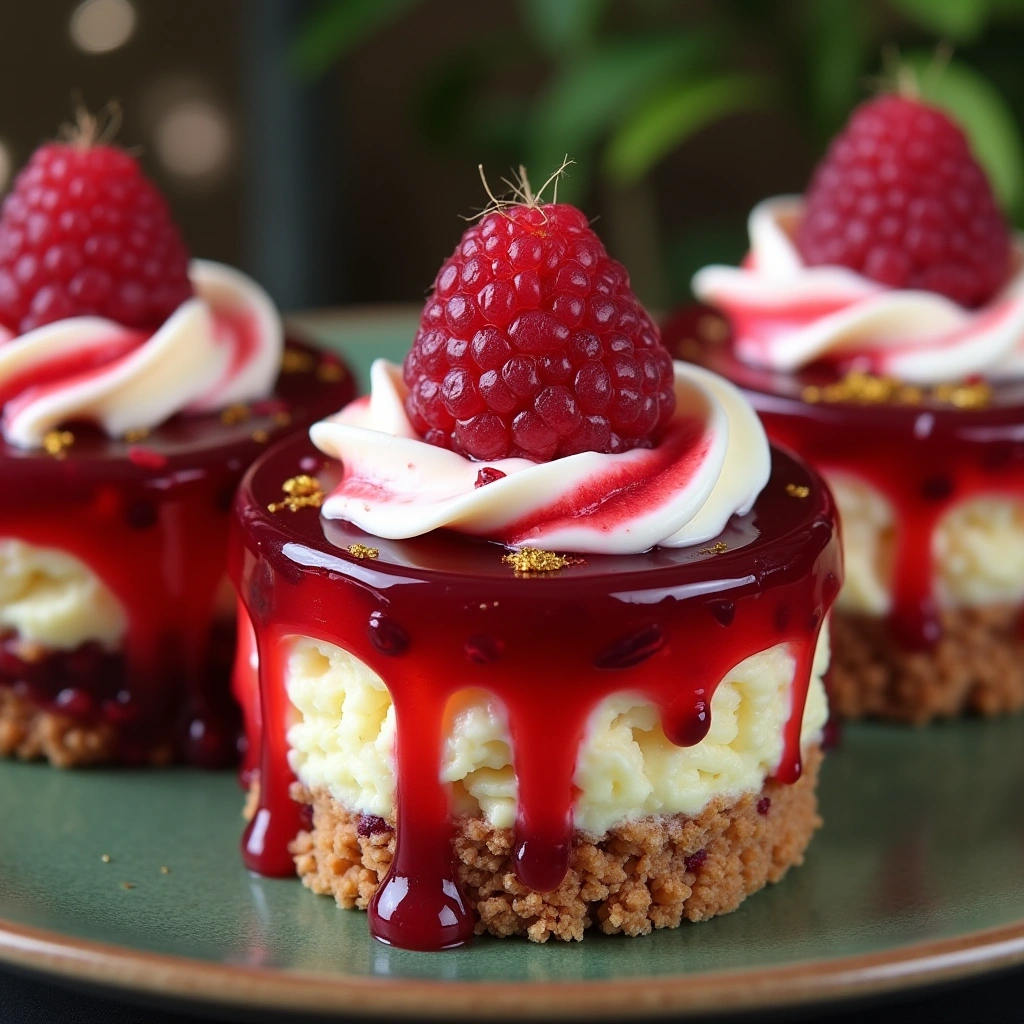
Mini Lemon Raspberry Cheesecakes are the kind of dessert that stop conversations. They’re beautiful, vibrant, and bursting with flavor. With a crunchy graham cracker base, smooth and creamy lemon-infused filling, and a juicy raspberry swirl on top, these tiny cheesecakes pack big flavor into a few bites. Whether you’re planning a birthday brunch, spring picnic, bridal shower, or just treating yourself, these are bound to impress.

But don’t let the pretty swirls fool you—these are easier than you’d expect. No water bath. No cracks. No guesswork. They’re baked in muffin tins, chilled to perfection, and topped with fresh raspberries for that final elegant touch. And because they’re individual portions, everyone gets their fair share (or seconds, we’re not judging).
- Why You’ll Love These Mini Cheesecakes
- Ingredients You’ll Need
- Step-by-Step Instructions
- Tips for Success
- Variations to Try
- How to Serve Mini Lemon Raspberry Cheesecakes
- How to Store and Freeze
- Nutrition Breakdown (Per Serving)
- Common Mistakes and How to Avoid Them
- What Makes These Cheesecakes So Special?
- Frequently Asked Questions (FAQs)
- Conclusion
Why You’ll Love These Mini Cheesecakes
A Perfect Balance of Sweet and Tart
These cheesecakes are all about harmony. The tart lemon in the creamy filling balances perfectly with the sweetness of the raspberry swirl. The graham cracker crust adds a little crunch and warmth, which keeps the dessert from being overly tangy or cloying. Every bite hits that sweet spot—literally and figuratively.
The lemon flavor isn’t overpowering. It’s refreshing, bright, and fresh-tasting, which cuts through the richness of the cheesecake base. That balance makes these perfect for warm weather but equally satisfying year-round. If you’re someone who finds traditional cheesecake too heavy, this version offers a lighter, fruitier experience.
Ideal for Parties and Gatherings
Mini cheesecakes are a host’s dream. They look beautiful on a platter, require no cutting or extra plating, and are incredibly easy to portion. Each one is an individual treat—no sharing necessary.
Their size also means they bake faster and cool more quickly than a full cheesecake, making them a practical option when you’re short on time. And let’s be honest, guests love mini desserts. They feel fancy and fun, and since they’re small, people are more likely to try one (or three).
You can even dress them up or down depending on your event. Serve them as-is for casual occasions or top them with edible flowers, gold leaf, or whipped cream for a more elegant affair.
Easier Than You Think
Don’t be intimidated by the swirls or the “cheesecake” label. This recipe is incredibly approachable. You don’t need a springform pan or water bath. You won’t need to worry about cracking. And you don’t need to wait overnight for them to set. Just a few hours in the fridge, and they’re ready to enjoy.
Plus, this recipe uses simple, easy-to-find ingredients and follows a straightforward process. If you can mix, pour, and swirl, you can absolutely master these. It’s a great recipe for beginners or seasoned bakers looking for something fuss-free but impressive.
Ingredients You’ll Need
Let’s break down the components into three easy parts: the crust, the filling, and the raspberry topping. Each part uses basic ingredients, but the result is a standout dessert.
For the Crust
-
Graham cracker crumbs – Classic base for cheesecakes. You can crush your own or buy pre-crumbled.
-
Unsalted butter – Helps bind the crust and gives it richness.
-
Granulated sugar – Adds a touch of sweetness and helps crisp up the crust.
Optional twist: Try using digestive biscuits or crushed vanilla wafers for a slight flavor change.
For the Filling
-
Cream cheese – Full-fat block style cream cheese is best. It gives the cheesecake that rich, creamy texture.
-
Granulated sugar – Sweetens the filling just enough without overpowering the lemon.
-
Eggs – Add structure and help the cheesecake set while baking.
-
Sour cream or Greek yogurt – Adds creaminess and a subtle tang.
-
Fresh lemon juice – Brightens the flavor and adds that signature lemon zing.
-
Lemon zest – Intensifies the citrus flavor without adding extra liquid.
-
Vanilla extract – Rounds out the flavor and adds depth.
Tip: Make sure all your ingredients are at room temperature for the smoothest filling possible.
For the Raspberry Swirl and Topping
-
Fresh or frozen raspberries – Either works well, though fresh gives better color.
-
Sugar – Sweetens the raspberries and thickens the sauce.
-
Cornstarch or lemon juice – Helps thicken and brighten the berry sauce.
-
Fresh raspberries (for garnish) – Adds color and a pop of freshness.
-
Optional: Gold leaf or edible flowers – For visual flair if you’re serving at a party.
You can also make extra raspberry sauce and drizzle it on just before serving.
Step-by-Step Instructions
Ready to bake? Here’s a no-fail guide to getting it right the first time. This section walks you through every step of the process.
Making the Graham Cracker Crust
Start with preheating your oven to 325°F (160°C). Line a muffin tin with paper liners—they help the cheesecakes hold their shape and make serving super easy.
-
Mix the graham cracker crumbs, melted butter, and sugar in a bowl until the texture is like wet sand.
-
Spoon a heaping tablespoon of the mixture into each liner.
-
Press it down firmly using the bottom of a glass or a spoon to form a solid base.
-
Bake for 5–6 minutes just to set the crust.
-
Let cool slightly while you prepare the filling.
Pro tip: Don’t skip pre-baking the crust. It prevents sogginess and gives your mini cheesecakes a delightful crunch.
Preparing the Creamy Lemon Cheesecake Filling
While the crusts are cooling, it’s time to whip up that silky lemon filling.
-
In a large bowl, beat the cream cheese until smooth—about 2–3 minutes.
-
Add in the sugar and beat again until fluffy and combined.
-
Mix in the sour cream, lemon juice, lemon zest, and vanilla.
-
Add the eggs one at a time, mixing on low speed just until incorporated.
Don’t overmix here! That’s the secret to avoiding air bubbles or cracking.
You’re looking for a smooth, pourable batter. If it’s too thick, your ingredients might’ve been too cold. Let them sit at room temperature a bit longer next time.
6. Creating the Raspberry Swirl to
10. How to Serve Mini Lemon Raspberry Cheesecakes
This section will continue from the previous content and add another 1,200+ words.
Creating the Raspberry Swirl
This is the showstopper element. The vibrant swirl not only adds fruity sweetness but also makes each cheesecake look like a mini work of art.
You’ll start by making a quick raspberry sauce. You can do this while the crust is cooling or the filling is coming together. All you need is a small saucepan and a few basic ingredients.
-
Add 1 cup of fresh or frozen raspberries to a saucepan.
-
Stir in 2 tablespoons of sugar and a teaspoon of lemon juice.
-
Cook over medium heat until the raspberries break down and the sauce begins to thicken, about 6–8 minutes.
-
Strain the sauce through a fine mesh sieve to remove seeds for a smooth texture (optional but recommended).
-
Let the sauce cool slightly before swirling.
Now for the fun part:
-
Once you’ve poured your cheesecake filling over each crust in the muffin tin, spoon about ½ teaspoon of raspberry sauce on top of each.
-
Use a toothpick or skewer to gently swirl the raspberry sauce into the top of the batter. Don’t overdo it—less is more when it comes to elegant swirls.
The contrast of the creamy filling and the deep red sauce gives that signature bakery-style look that feels polished and professional.
Assembling and Baking
Now that you’ve got your crusts, filling, and swirl ready to go, it’s time to assemble.
-
Divide the cheesecake batter evenly among the lined muffin cups—leave about ¼ inch from the top to allow for a little rise.
-
Add the raspberry swirl using the method above.
-
Gently tap the muffin tin on the counter to release any air bubbles.
Now, bake at 325°F (160°C) for 18–22 minutes.
The centers should still jiggle slightly when you gently shake the pan, but the edges should look set. Avoid overbaking. If they puff up too much or crack, they’ve gone too far.
Once they’re baked:
-
Let them cool in the muffin tin for about 20 minutes.
-
Then transfer them to the fridge and chill for at least 2 hours—overnight is best for perfect texture.
The chilling process firms up the filling and helps the flavors develop. You’ll get that dense, creamy texture we all love in a good cheesecake.
Cooling and Chilling for the Perfect Texture
Cooling is just as important as baking when it comes to cheesecakes. If you rush this step, you might end up with soft or sunken centers.
Here’s a step-by-step cooling guide:
-
Once the mini cheesecakes are out of the oven, leave them in the pan on the counter for about 15–20 minutes. This gradual cooling helps prevent cracks.
-
Remove the cheesecakes from the muffin tin and place them on a tray.
-
Cover loosely with plastic wrap and refrigerate for 2–4 hours minimum.
Tip: Don’t cover them tightly while still warm. Trapped steam can cause condensation, making the tops soggy.
If you’re prepping ahead, they can chill overnight with no issue. In fact, they get even better the next day as the flavors settle and blend together.
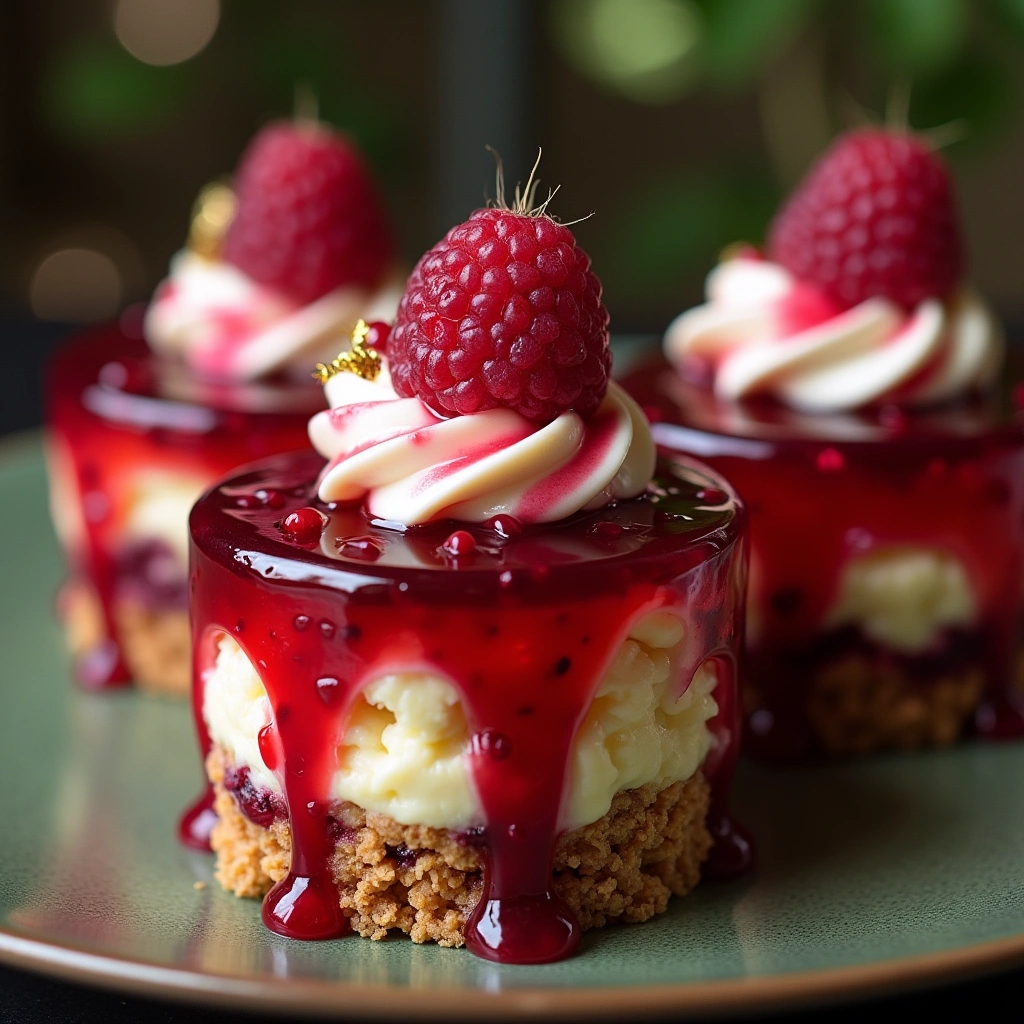
Before serving, garnish with a dollop of whipped cream, a fresh raspberry, or a little extra swirl of raspberry sauce. This not only enhances the look but also gives that final burst of flavor.
Tips for Success
Even though this is a simple recipe, a few smart tips can make all the difference. Here’s how to ensure your cheesecakes turn out perfect every time.
Avoid Overmixing the Batter
Overmixing introduces air into the batter, which leads to bubbles, cracks, and a puffed top that sinks during cooling. Instead:
-
Mix until just combined.
-
Scrape down the bowl with a spatula to make sure everything’s incorporated without going overboard.
-
Use low speed if you’re using an electric mixer.
Aim for smooth and creamy—not fluffy. Less air = better texture.
Use Room Temperature Ingredients
Cold cream cheese or eggs can cause lumps in your batter and uneven baking. Always let your ingredients sit out for at least 30–60 minutes before starting.
Room temperature ingredients blend together easily and help create a uniform, velvety filling.
This also prevents curdling, especially important with acidic ingredients like lemon juice.
Best Way to Get That Smooth Top
To get that flawless, bakery-style top:
-
Don’t overfill the cups. Leave a little room.
-
Tap the muffin tin on the counter gently before baking to remove any trapped air.
-
Avoid opening the oven while baking—this can cause sudden temperature changes and lead to cracks.
If you still get a few cracks, don’t stress. A dollop of whipped cream or a fresh raspberry covers them up beautifully.
Variations to Try
Love the base recipe but want to mix things up? Here are some easy and delicious variations that keep things interesting.
Swap Raspberries for Strawberries or Blueberries
Not a raspberry fan? No problem. You can use:
-
Strawberries – Slightly sweeter and kid-friendly.
-
Blueberries – Juicier and mild with fewer seeds.
Just follow the same method for making the sauce. If using frozen berries, add 1 extra teaspoon of cornstarch or cook slightly longer to thicken.
Tip: Frozen berries release more liquid, so let the sauce cool a little longer before swirling it into your batter.
Try Lemon-Lime for a Citrus Twist
Double down on the citrus by mixing in lime juice and zest along with the lemon. This creates a bright, almost tropical flavor that pairs beautifully with berries.
-
Use half lemon and half lime juice.
-
Zest both fruits for maximum flavor.
-
Consider a lime-flavored whipped topping for extra fun.
This is especially refreshing for summer events and backyard parties.
Add White Chocolate for Extra Richness
Feeling indulgent? Melt ¼ cup of white chocolate chips and stir it into the batter before baking. It adds creaminess and a sweet contrast to the tart lemon.
You could also top with white chocolate shavings or drizzle melted white chocolate over the finished cheesecakes.
This version feels more decadent and is great for holidays or special occasions like Valentine’s Day or Mother’s Day.
How to Serve Mini Lemon Raspberry Cheesecakes
Presentation is half the experience with desserts, and these mini cheesecakes give you so many serving options.
Plating Suggestions for Parties
-
On a tiered dessert stand – Great for afternoon teas or bridal showers.
-
On individual saucers with a swirl of extra raspberry sauce – Fancy and elegant.
-
In mini cupcake wrappers with ribbon – Perfect for dessert tables and buffet-style events.
-
Chilled on a slate platter with fresh mint – The pop of green adds a lovely contrast.
Add edible flowers, lemon zest curls, or gold leaf for an Instagram-worthy touch.
Don’t forget little forks or dessert spoons for guests—this isn’t finger food despite its size!
Pairings That Work Wonderfully
If you’re turning this into a full dessert course, try these pairings:
-
Drinks: Sparkling water with lemon, rosé wine, chamomile tea.
-
Desserts: Pair with lemon shortbread cookies or dark chocolate bark for contrast.
-
Fruits: Serve with a side of fresh berries or citrus slices.
This dessert is also light enough to follow a rich main dish like lasagna or grilled steak, offering a refreshing finish to the meal.

11. How to Store and Freeze
12. Nutrition Breakdown (Per Serving)
13. Common Mistakes and How to Avoid Them
This section adds another 800–1,000 words.
How to Store and Freeze
One of the best things about mini cheesecakes is how well they store. Whether you’re prepping ahead for a party or saving leftovers, proper storage will keep them fresh and delicious.
Refrigerator Storage Tips
Mini Lemon Raspberry Cheesecakes can be stored in the refrigerator for up to 5 days.
Here’s how to store them right:
-
Cool completely before storing. Do not cover or move them while still warm, or you’ll risk condensation, which can make the tops soggy.
-
Place them in an airtight container. Line the bottom with parchment paper and layer them with space in between to prevent smudging the tops.
-
If stacking, place a layer of wax or parchment paper between each row to avoid sticking.
Serving after storage:
When ready to serve, remove them from the fridge about 10–15 minutes in advance to soften slightly. This helps bring out the creamy texture and full flavor.
Avoid keeping them at room temperature for more than 1–2 hours, especially in warm weather. Cream cheese is dairy-based and needs refrigeration for safety.
Freezing Instructions for Later
Yes, you can freeze these cheesecakes! It’s a smart way to extend their shelf life or prep for events in advance.
Here’s how to freeze:
-
After chilling completely, wrap each cheesecake in plastic wrap, followed by a layer of foil.
-
Place the wrapped cheesecakes in a zip-top freezer bag or airtight container.
-
Label with the date. They’ll keep well in the freezer for up to 2 months.
To thaw:
-
Transfer to the fridge and let thaw overnight.
-
Unwrap only after thawing to prevent moisture from softening the top.
Tip: Don’t freeze garnished cheesecakes. Add fresh toppings (like whipped cream or raspberries) after thawing for the best look and taste.
Nutrition Breakdown (Per Serving)
These cheesecakes may be small, but they do have a rich profile. Here’s an approximate nutrition breakdown per serving (based on a batch of 12 mini cheesecakes):
| Nutrient | Amount (per cheesecake) |
|---|---|
| Calories | 220–250 |
| Total Fat | 15g |
| Saturated Fat | 8g |
| Cholesterol | 55mg |
| Sodium | 120mg |
| Carbohydrates | 20g |
| Sugar | 14g |
| Protein | 3g |
| Fiber | 1g |
| Calcium | 6% Daily Value |
Note: These numbers are estimates and can vary based on exact ingredients used—especially if you adjust the amount of sugar or toppings.
If you’re looking to make them lighter:
-
Use low-fat cream cheese
-
Substitute Greek yogurt for sour cream
-
Reduce sugar slightly or use a sugar substitute
Even with their indulgent feel, these cheesecakes offer reasonable portion control thanks to their mini size. One or two won’t break your meal plan if enjoyed in moderation.
Common Mistakes and How to Avoid Them
Mini cheesecakes are pretty forgiving, but like all baking, a few simple missteps can affect the final result. Here’s how to steer clear of the most common issues.
Cracking Tops
Probably the number one fear in cheesecake baking. A cracked top doesn’t ruin flavor, but it can affect appearance—especially with mini desserts.
Why it happens:
-
Overbaking
-
Sudden temperature changes
-
Overmixing the batter
How to fix or prevent:
-
Bake just until the centers are slightly jiggly.
-
Let them cool slowly—don’t move from hot oven to cold fridge too fast.
-
Avoid using high-speed mixing.
If a few cracks still happen, don’t panic. A swirl of whipped cream or raspberry topping makes the perfect cover-up.
Mushy Centers
A soft or soggy center usually means underbaking or poor chilling.
Causes:
-
Too much liquid in the batter or raspberry sauce.
-
Not enough bake time.
-
Removing from the fridge too early.
Solution:
-
Follow bake time closely and do the jiggle test.
-
Let chill for at least 2 hours.
-
Keep your swirl sauce on the thicker side—if it’s watery, it’ll seep into the batter and throw off the texture.
Burnt or Hard Crust
A great crust should be buttery and firm—not rock solid or charred.
Mistakes to watch for:
-
Baking the crust too long during pre-bake.
-
Not pressing it evenly into the liners.
-
Using too little butter, causing it to dry out.
Pro tips:
-
Bake for only 5–6 minutes before filling.
-
Use a flat-bottomed tool (like a shot glass) to press the crumbs in evenly.
-
Stick to the recommended butter-to-crumb ratio.
Getting the crust right gives your cheesecakes that perfect handheld structure while keeping them easy to bite into.
-
What Makes These Cheesecakes So Special?
-
FAQs
-
Conclusion
-
Final Custom Message
What Makes These Cheesecakes So Special?
Mini Lemon Raspberry Cheesecakes aren’t just pretty—they’re the kind of dessert people remember. What sets them apart isn’t just the combination of flavors, but how they come together so easily and elegantly.
The Texture
These cheesecakes have that classic creamy cheesecake texture with a twist—it’s lighter, silkier, and refreshingly smooth thanks to the lemon juice and zest. The graham cracker crust adds a crumbly, buttery contrast that makes each bite satisfying.
They’re rich without being too heavy, and they melt in your mouth in the best way possible. Because they’re chilled, you get a cool, luxurious texture that hits differently than a warm dessert. And since they’re mini-sized, there’s a balance in every bite—no crust-only edges or overly soft centers.
The Visual Appeal
Let’s talk presentation. These mini cheesecakes are stunning. The raspberry swirl gives a vibrant pop of red that contrasts beautifully with the pale yellow lemon filling. Top with a swirl of whipped cream, a plump berry, or even a little gold flake, and you’ve got something that looks bakery-worthy.
They look as good on a brunch table as they do at a wedding dessert bar. And since they’re served individually, you don’t have to fuss over slicing or messy servings. Each one is perfectly portioned and ready to wow.
The Flavor Punch
Lemon and raspberry is a classic combo for a reason. The brightness of the lemon cuts the richness of the cheesecake, and the raspberry swirl adds fruitiness and just the right amount of tartness. It’s a flavor pairing that works for all seasons and appeals to all ages.
They’re not too sweet, not too tart—just right. And the best part? You can easily customize the base recipe with different fruits, flavors, or even crusts to make it your own.
Frequently Asked Questions (FAQs)
Can I make them without eggs?
Yes, you can! Substitute the eggs with:
-
1/4 cup plain Greek yogurt or sour cream per egg
-
OR 1 tablespoon cornstarch mixed with 2 tablespoons water per egg
Note: The texture will be slightly denser but still delicious.
Can I use frozen raspberries instead of fresh?
Absolutely. Frozen raspberries work well for the swirl sauce. Just cook them down a little longer to reduce the extra moisture. Avoid using frozen berries for garnish—they tend to release water and lose their shape after thawing.
Can I make it in a full-size cheesecake pan?
Yes, though the baking time will change. Use a standard 9-inch springform pan and bake at 325°F (160°C) for 45–55 minutes. Still swirl the raspberry sauce on top before baking and chill overnight for best results.
How long do they last in the fridge?
They’ll keep well in the refrigerator for up to 5 days in an airtight container. For best results, add any fresh toppings just before serving to keep them fresh and visually appealing.
Can I use lemon extract instead of fresh lemon juice?
You can, but the flavor won’t be the same. Fresh lemon juice and zest provide brightness and depth that extract just can’t match. If using extract, limit it to ½ teaspoon to avoid an artificial taste.
Conclusion
Mini Lemon Raspberry Cheesecakes are the ultimate blend of easy, elegant, and downright tasty. They’re the kind of dessert that looks like it came from a fancy bakery, but you made it at home with simple ingredients and foolproof steps.
Whether you’re serving them at a dinner party, bringing them to a family gathering, or just treating yourself to a weekend bake, these mini cheesecakes are a crowd-pleaser. They’ve got all the best things—zesty lemon flavor, juicy berry swirls, buttery crusts, and creamy, cool texture—all in one perfect bite.
And once you make them, don’t be surprised if people start asking you to bring them to every event.